
In healthcare, staff shortages remain a critical bottleneck in patient monitoring. Automating the data collection process reduces the repetitive workload on frontline clinicians, allowing them to focus on high-priority care. While automated systems still require oversight to manage alerts, the personnel required for centralized monitoring is significantly lower than for traditional manual rounds. This article explores using Home Assistant and 7-segment OCR as a cost-effective solution for logging health data from legacy medical devices.
Concept
graph TD;
A[Web Cam focus at Medical devices]-->B[Image Capture & Processing];
B-->C[Data Validate & Process]
C-->D[Home Assistant Server]
D-->E[Alert and Notification]
D-->F[Data log txt/db]

classDef orangeNode fill:#facc15,stroke:#333,stroke-width:2px,color:#000;
    class A,B,C,D,E,F orangeNode;
The core concept of this integration addresses the technical gap in Legacy Medical Hardware. Most traditional monitors lack network connectivity (Wi-Fi/Ethernet) and cannot natively export data logs or trigger remote alarms.
To bridge this “analog gap”. We utilize standard web cameras as non-invasive data bridges. By focusing the camera exclusively on the 7-segment display of the device, we achieve two critical goals:
1. Privacy Compliance: By cropping the image to the device’s numerical display, we avoid capturing Patient Identifiable Information (PII), ensuring the system remains compliant with international privacy regulations (such as GDPR or HIPAA).
2. Increased Data Granularity: Human monitoring is limited by staff availability, often resulting in infrequent data points (e.g., every 4–8 hours). This automated system allows for logging intervals that are significantly more frequent; at least 2 to 10 times the rate of manual observation, providing a high-fidelity trend map for clinical review.
Deployment
For the Home Assistant host, a Dedicated Mini-PC (x86_64) or Old PC server/Workstation is strongly recommended over a Raspberry Pi. The OCR process is CPU-intensive, and the requirement for continuous data logging demands highly reliable storage media.- The Host: A refurbished small-form-factor PC (e.g., Intel NUC, Dell OptiPlex Micro) provides the best performance-to-cost ratio.
- Memory: While 8 GB is sufficient for basic tasks, 16 GB of RAM is recommended to ensure smooth performance when running multiple Docker containers and processing high-resolution image frames.
- Storage: A SATA or NVMe SSD is mandatory. Unlike the SD cards used in Raspberry Pis, an SSD can handle the high I/O frequency of constant logging without risk of corruption.
- Operating System: Ubuntu Server (LTS) is the preferred choice. While Podman or macOS-based containers are alternatives, a Debian-based Linux server offers the most stable environment and the widest community support for Home Assistant hardware passthrough (cameras and USB devices).
Operating System & Core Services
We will skip the basic Linux installation steps, as most users in this space are familiar with the process. However, two critical steps during the Ubuntu Server installation must be highlighted:
1. Docker Integration: Ensure you select the Docker option during the “Featured Server Snaps” stage of the installer. This streamlines the setup and ensures the Docker engine is ready on the first boot.
2. Core Services:
- SFTP: Essential for moving configuration files, custom OCR scripts, and snapshots between your development machine and the server.
- NGINX: Highly recommended as a reverse proxy. While Home Assistant has a built-in web server, Nginx provides an extra layer of security and allows you to handle SSL certificates (via Let’s Encrypt) more efficiently.
Note: If you already have a centralized front-end server or a dedicated load balancer in your network, the Nginx part can be bypassed.
Software Setup
For the installation of Home Assistant via Docker, I recommend following the guide at
Home Automation Guy. While that article utilizes Portainer (a web-based GUI for managing containers), you can equally manage these services via the command line.
If you prefer the official documentation or are considering different deployment methods (such as Virtual Machines), refer to the Home Assistant Linux Installation Guide. This page outlines every supported option, from the Home Assistant Operating System (HAOS) to standalone Docker containers.
Core Configuration: Docker Compose
For this project, using Docker Compose is the most logical choice. It allows us to define both Home Assistant and our OCR worker in a single file, ensuring they start together and can communicate easily.
Implementing the 7-Segment OCR Integration
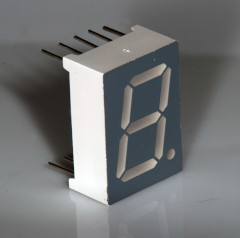
The core of our data logging system is the Home Assistant Seven Segments OCR integration. This component utilizes the ssocr (Seven Segment Optical Character Recognition) tool to “read” the numerical output from your medical device’s display.
1. Installing ssocr
Since we are running Home Assistant in a Docker container, the ssocr binary must be accessible within that container’s environment. The most reliable method is to use a custom Dockerfile to ensure the dependency is always present:
Custom Dockerfile to include OCR tools
FROM ghcr.io/home-assistant/home-assistant:stable
RUN apk add --no-cache ssocr
2. Calibration
SSH into your Ubuntu server and test the OCR engine against a still image from your camera. This allows you to fine-tune the threshold before committing to the Home Assistant config.
Execute a test command:
ssocr -D crop 100 50 200 100 -t 25 -d 3 snapshot.png-t (Threshold): Sets the sensitivity (important for varying light).
-d (Digits): Tells the engine how many numbers to expect (e.g., 3 for heart rate).
3. Home Assistant Configuration
Once you have verified the coordinates manually, add the integration to your configuration.yaml. This turns the image into an image_processing entity.
image_processing:
- platform: seven_segments
source:
- entity_id:  amera.medical_display
x_position: 100
y_position: 50
width: 200
height: 100
threshold: 25
digits: 3
4. Turning Image Data into Health Metrics
The OCR integration creates a state, but to log this into a text file or database, we need to convert it into a numeric sensor using a Template Sensor:
sensor:
- platform: template
sensors:
patient_vitals_logging:
friendly_name: "Patient Vitals"
value_template: "{{  states('image_processing.seven_segments_ocr') }}"
unit_of_measurement: "Units"
Caution:
Medical displays often have high-gloss screens. If the OCR fails due to reflections, do not increase the threshold; instead, adjust the camera angle or use a circular polarizing filter to cut the glare. This physical fix is always superior to a software workaround.
The integration of 7-segment OCR into healthcare data logging is just the beginning of how open-source tools can alleviate the burden on frontline staff. By automating the “eyes” of the clinic, we ensure that no trend goes unnoticed while allowing human professionals to focus on care rather than clerical data entry.
Potential Expansion Scenarios:
- Environmental Correlation: Adding Zigbee temperature and humidity sensors to the room to see how environmental factors affect patient vitals over time.
- Alert Escalation: Using the Home Assistant Companion App to send critical notifications to a nursing station’s tablet if a value stays out of range for more than three consecutive reads.
- Centralized Dashboarding: Using Grafana (running in another Docker container on your Ubuntu server) to visualize long-term trends for physician review during rounds.